
If you’ve tried self-hosting WordPress, but found it a struggle, and are ready to try WordPress.com instead, this is for you. Notice I said “try”– you can start off by just trying WordPress.com, and if it meets your needs, you can finish the move.
This is the overview of what you’ll need to do:
- Setup a site on wordpress.com
- Export content from the old site
- Import content into the new WordPress.com Site
- Point folks to your new site
These are basically the same steps as WordPress.com explains in their short tutorial. Except their tutorial misses a few things: yes it will bring your posts into the new site, but it skips some important details.
So without further ado…
1. Setup a WordPress.com Site
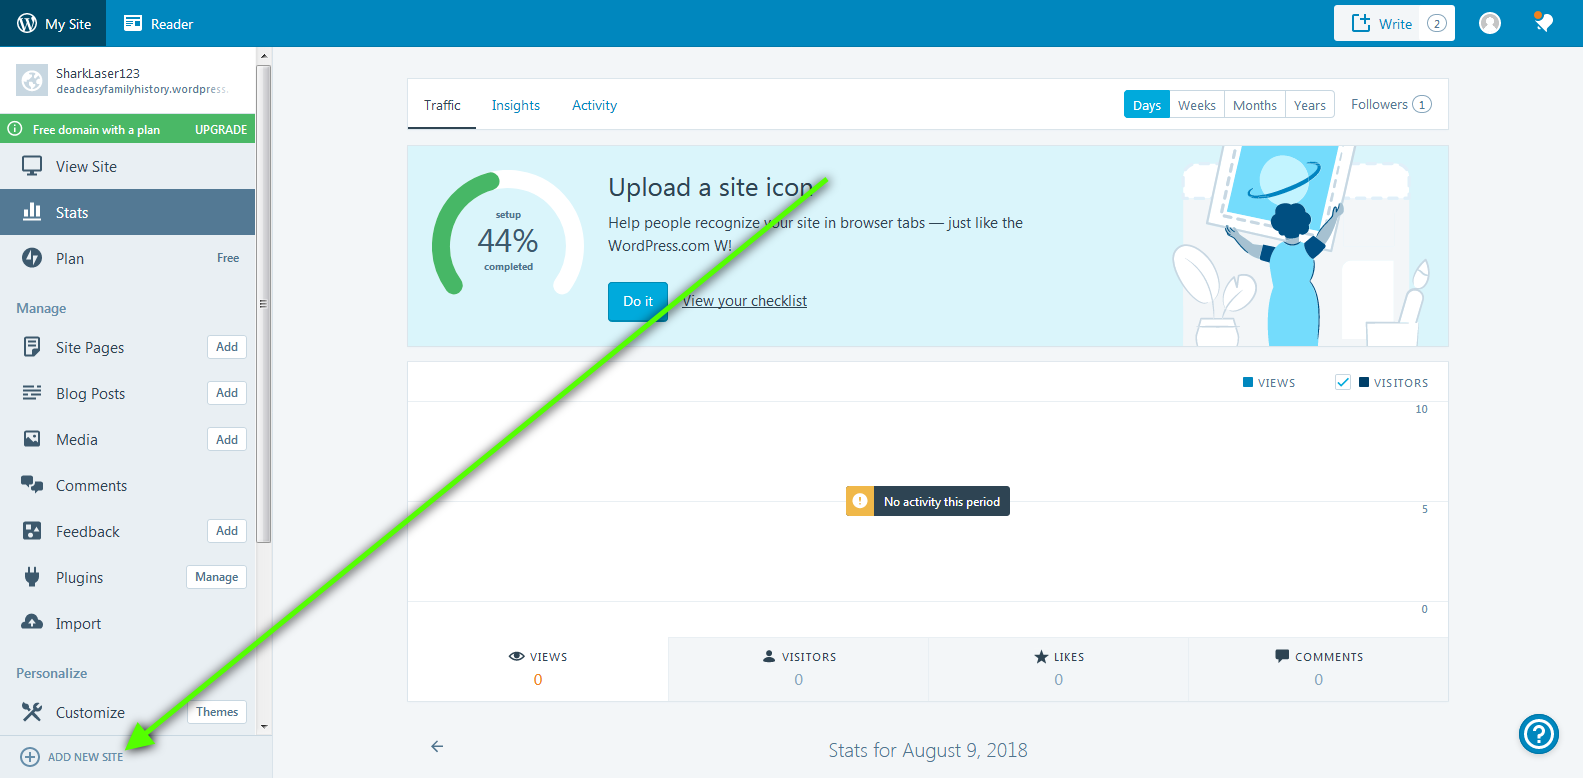
You don’t need to rack your brain wondering if WordPress.com will serve all your needs. Just create a free site there, and try it out. Then you’ll know if you should follow through with the rest of the steps.
But before you go off and do that, an important note:
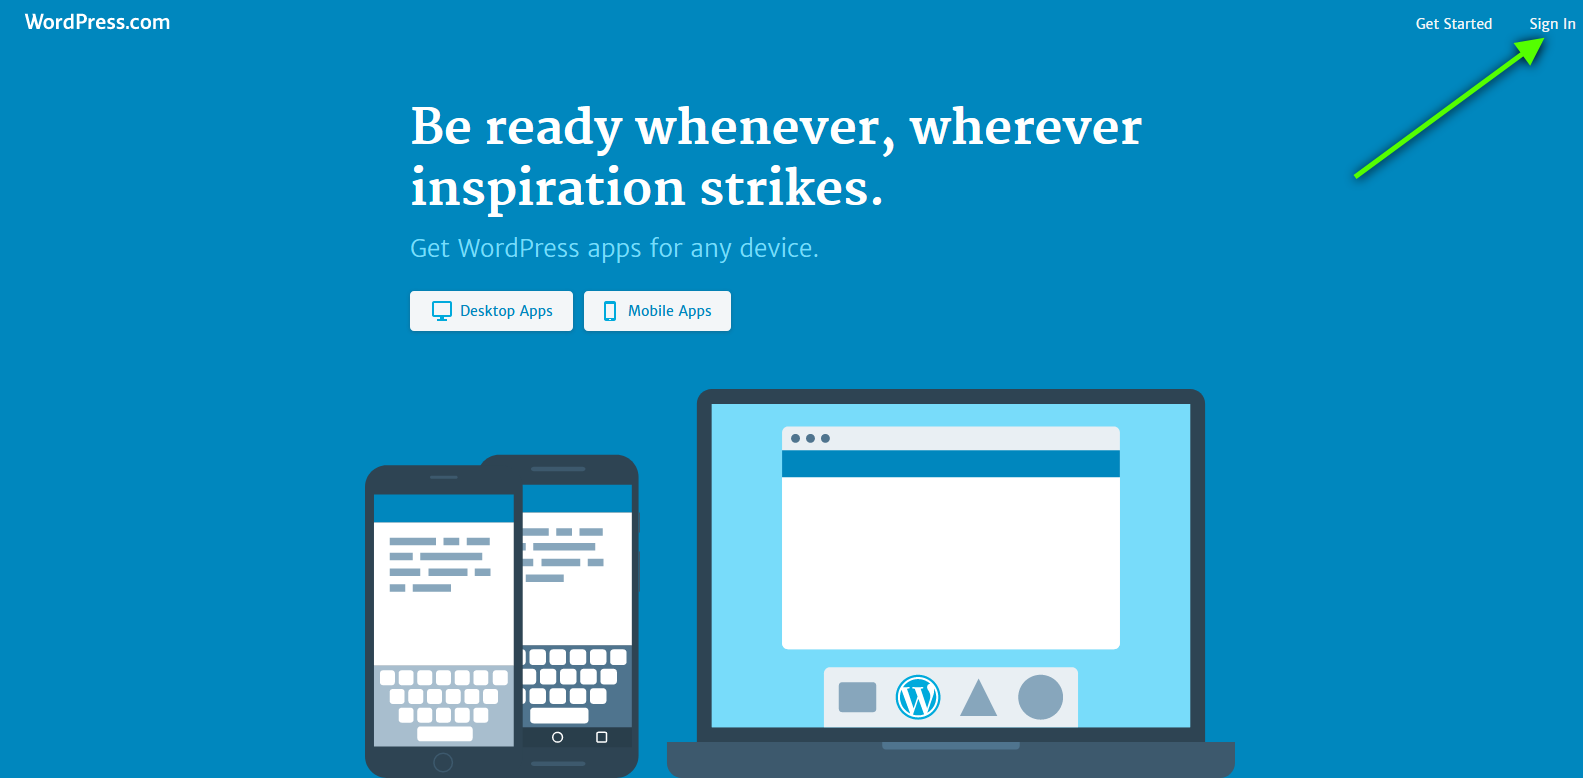
If your old site uses the JetPack plugin, first sign into WordPress.com using the same account as you used for JetPack.
(If you’re not sure if your old site used the JetPack plugin, sign into your old site, click “Plugins” and look for it, and if it says it’s “Active”. If it’s not there, or it doesn’t say “Active”, then you don’t have it activated.)
If you do have JetPack activated, follow the instructions under 1.1 Create a Site with your Existing JetPack Account. If not, skip that, and instead follow the instructions under 1.2 Create a New Account and Site on WordPress.com.
1.1 Create a Site with your Existing JetPack Account
If you want to move your subscribers over from your old site to the new one, it’s important they both be on the same account (here’s why). So here’s what to do:

Great, you’ve started making your site. Go to Section 1.3 Setup New WordPress Site.
1.2 Create a New Account and Site on WordPress.com
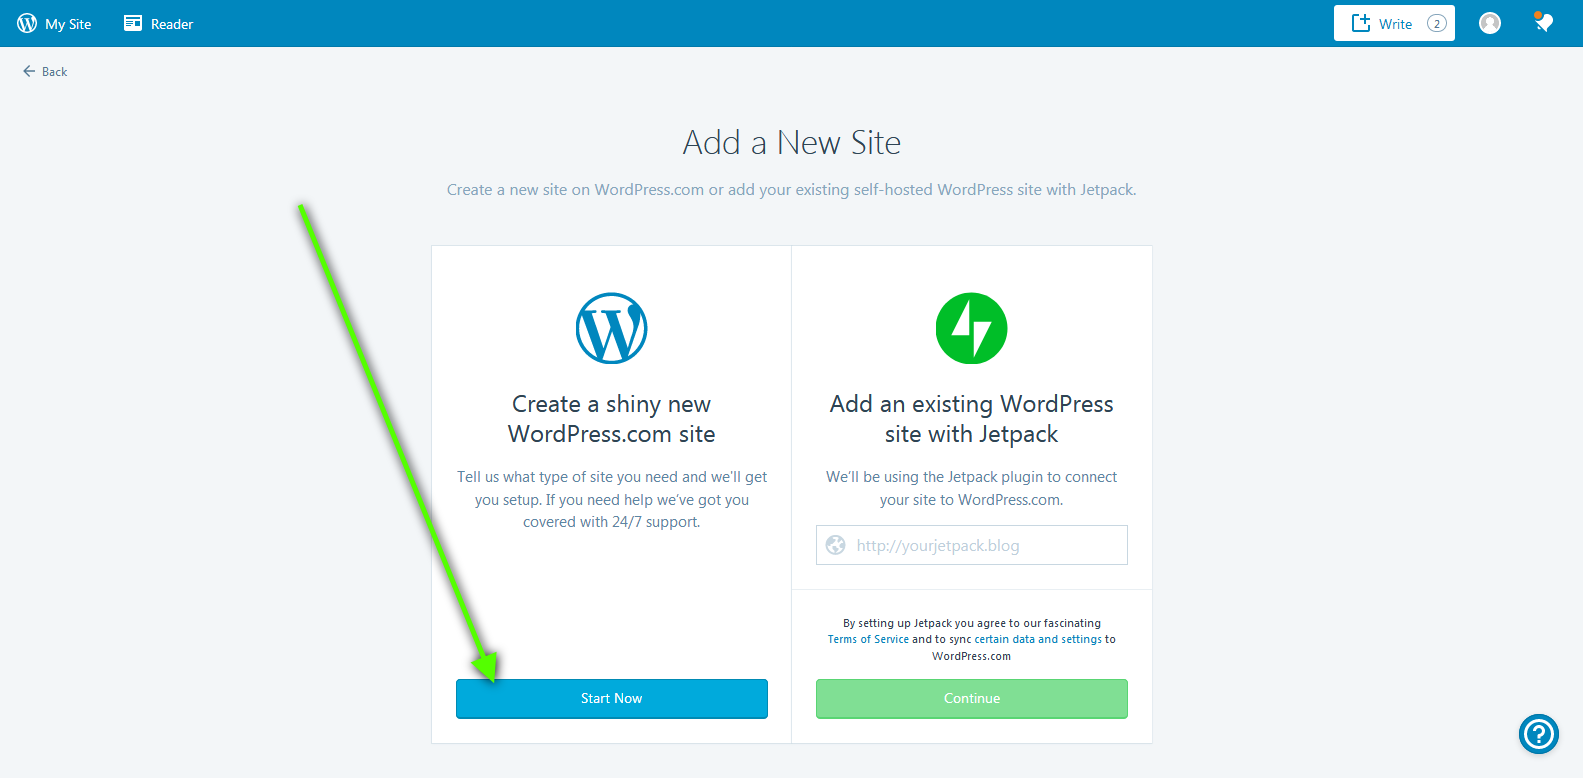
If your old site didn’t have JetPack on it, then just start creating a new site on wordpress.com and create a new account. Here’s what to do:

Then, continue below…
1.3 Setup New WordPress Site
These steps are the same regardless of whether you had a JetPack account or not.

Now comes choosing a domain. If you think you want to move your old site to wordpress.com, even if you do own the domain already, I would suggest you should initially select the free wordpress.com domain. Why? This way your old site will continue to be alive and well, meanwhile, you can play and tinker on the new site before any visitors arrive at it. Transferring the domain (which is when site visitors will start going to your new site) is actually the last step we want to do, and we’ll get there. But for now, we want to try out wordpress.com and set the site up.


If you didn’t already have an account, they’ll ask you to create it on the last step. And from here, you can play with using wordpress.com.
1.4 Play with Your New WordPress.com Site
You now have a wordpress.com site. Time to figure out if you like it, and if it will meet your needs! I suggest:
- If you want to stick with your old theme, search to see if it’s available on wordpress.com (it might be a premium theme, require having a Premium plan, or it might not exist on wordpress.com, in which case you’ll need to buy the Business plan and upload it). Alternatively, you’re free to experiment with new themes.
- Try writing an experimental post. The post-writing interface is different on wordpress.com (it’s code name is “Calypso”, if you care to know). It is meant to be more streamlined, but it’s different. Make sure you’re happy with it. After you’ve written this post, feel free to trash it.
- Most importantly, you have no plugins on wordpress.com (unless you’re on the Business license), which means there might be some things you could do on your old site that you can’t do on wordpress.com. Eg, maybe you could sell products, or view Google Analytics. Well, wordpress.com has quite a few options, but they’re certainly not the same or as flexible. Make sure you can do all the important things you used to do on your old site.
- Also, if your old site’s plugins stored data, that data might not migrate to wordpress.com. Eg., even if you purchase the Business license and upload the plugin onto wordpress.com, there still might be data stuck on your old site.
- If you have lots of media (eg images, videos, and audio files) on your old site, you may want to double-check wordpress.com will have enough space for them. On your old site, you can install the “My Simple Space” plugin, then go to your Dashboard page. You’ll see the “My Simple Space” widget. The important number is the one next to “uploads”. If it’s more than 3GB, you’ll need to have a paid plan. See the storage limits on the wordpress.com plans here.
But don’t worry about moving all your old posts and pages over. We’ll do that next. For now, just play around with it and verify it meets your needs.
2. Export Content from the Old Site
This is where your old self-hosted WordPress site will export all its old posts, pages, comments, and media into a file you can upload to wordpress.com.
This is really easy if you plan on using the same domain for your wordpress.com site as you used to use on your self-hosted site (eg, your old domain was “kitchengadgets.com”, and after you’ve got your new wordpress.com website all setup, it will be the new “kitchengadgets.com”). If so, skip ahead to generating the export file.
But if your wordpress.com site is going to have a different domain (eg, your old domain was “kitchengadgets.com” but you’ll be using a new custom domain called “kitchenstuff.com” or you’ll permanently stick with “kitchengadgets.wordpress.com”), you should update all the links in your posts before you export your data.
2.1 Updating Links to Your New Domain
In your current site, you probably have images, and links to other pages and posts on your website right? Well, if your new wordpress.com site is going to have a different domain, all those links will still point to your old website, which I doubt you want. You want to keep people on your new site, especially if you will shut down your old site.
Changing all the image URLs and links one-by-one is tedious, so here’s how to do is all at once: use the “Better Search and Replace” plugin.
Before doing this, it’s probably a good idea to make a database backup of your old site, just in case something goes haywire. (Don’t worry, this is probably the last time you’ll do it, wordpress.com will take care of that once you’ve moved over.) Here’s a good explanation of how to do that.
After you’ve created a backup, here’s how to update the links…


Visit a post or page that had a link on it. The link should now send you to your new site (although we haven’t yet brought all the posts and pages into the new site, so that particular page might not yet be setup; that’s fine, be patient.)2.1
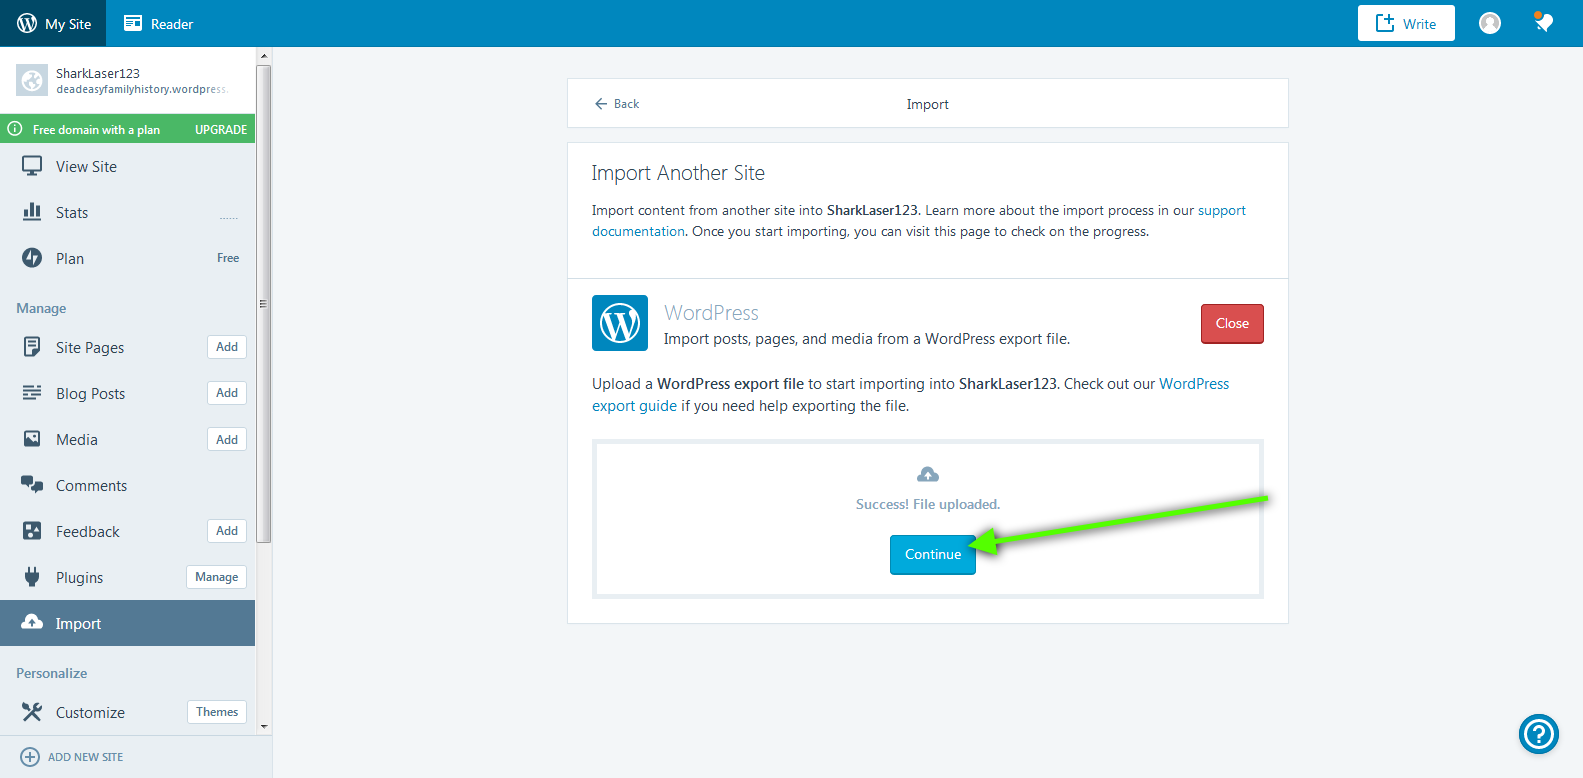
2.2 Export Posts, Pages, Media and Comments From Your Old Site
This is where we download the posts, media, and comments from your old self-hosted site into a file, which we’ll later upload to wordpress.com


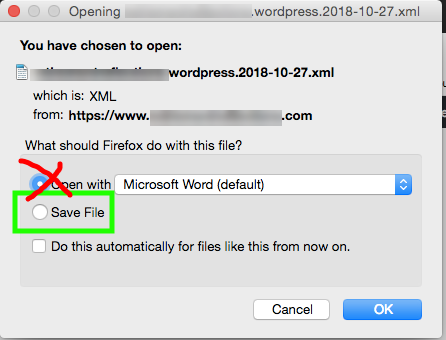
JUST SAVE IT. (Your computer won’t know how to open it and will give you errors if you try.)
Ok, now you’ve got the export file. Continue…
3. Import Content Into Your New WordPress.com Site
This is where your new wordpress.com site will get all the blog posts, pages, media, and comments from your old self-hosted site.
Before importing, you probably want to temporarily disable sending pingbacks. Otherwise, WordPress will treat each imported blog post as a new blog post, and send pingbacks for them all. This is probably not what you want (you probably already sent pingbacks for all of them).

Once the import is finished, you might want to turn this back on, but it’s almost certainly not what you want when importing your old posts to the new site.


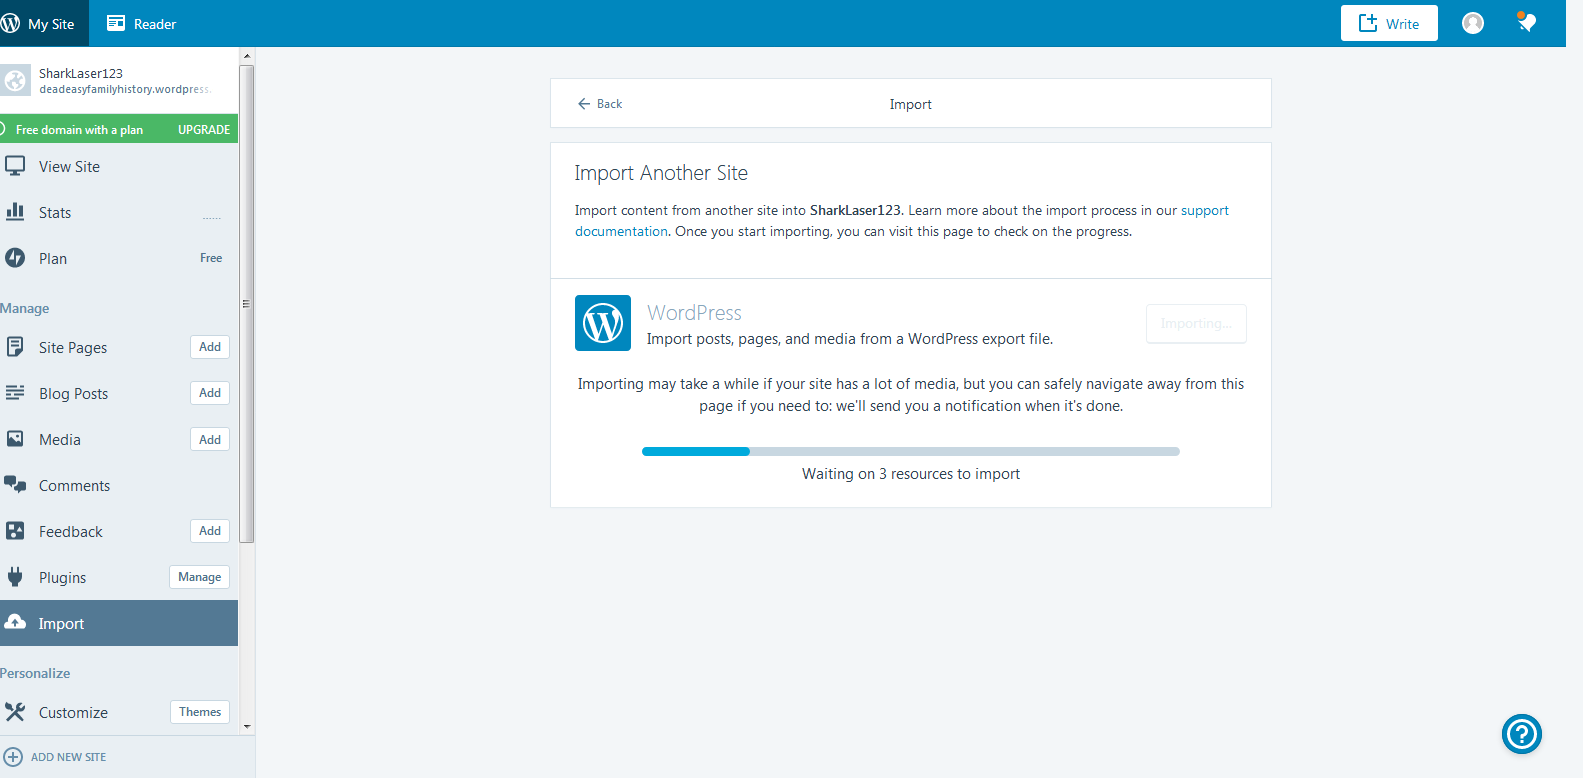
Once they notify you that the import is complete, double-check your blog posts, pages, media, and comments are all there and work ok. It’s probably good to view some of them from the front-end of your website (easiest way to do that is to just enter your domain into your browser’s address bar).
At this point, you may also need to update your site’s menu (click “Customize” then “Menus”) to have it look like it did on your old site.
If something doesn’t look right, ask wordpress.com support what’s wrong (or use the forums, someone will likely respond in a day). Try your best to describe
- what you wanted to happen
- what you did
- what, when, and where you see a problem
Barring any trouble, at this point your new wordpress.com site should work as you want. If you’re happy with it, it’s time to move your domain over to wordpress.com, and your subscribers too…
4. Point Folks to Your New Site
Up until this point, your old self-hosted site is still the one everyone is using. This is the step where you fully commit to using WordPress.com for your new site.
If you want your new wordpress.com site to use the same domain as your old self-hosted site (eg, if your old self-hosted site was “kitchengadgets.com” and you now want “kitchengadgets.com” to be your wordpress.com site), you’re going to need to either “transfer your domain” or “map your domain”. (But if you’re happy with your wordpress.com site’s current domain, skip ahead to 4.2 Migrate Old Subscribers).
4.1 Transferring/Mapping Your Domain to WordPress.com
This will make it so when readers enter your old website address (eg “kitchengadgets.com”) they’ll be sent to your new wordpress.com site instead of your old self-hosted site.
WordPress.com already has a good explanation of how to do this here. They’re pretty thorough though, and so it got pretty big. So how about I walk you through it?
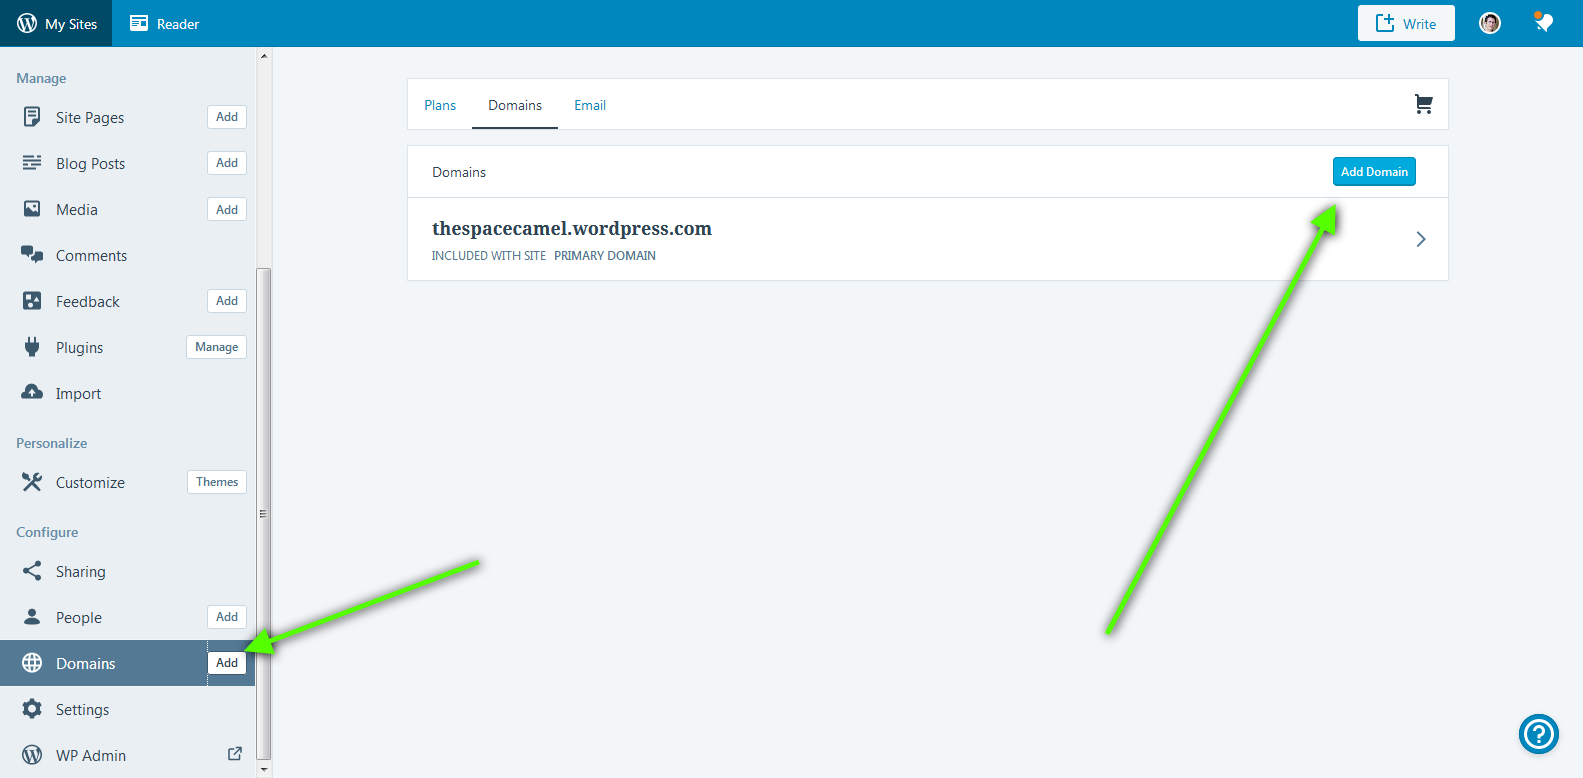


Now time for you to decide something: do you want to transfer the domain, or map it.
- Transferring the domain means that, from now on, you’ll pay wordpress.com for domain registration (eg, owning the domain “kitchengadgets.com”). WordPress.com will become your domain registrar.
- Mapping the domain means you will continue to pay your old hosting company (or domain registrar) for domain registration.
Which should you choose? I suggest you probably want to just transfer it. Here’s why:
- transferring will be simpler in the long run, as you’ll just be dealing with WordPress.com for your website and managing your domain
- although WordPress.com slightly overcharges for domain registration (like $10 a year), they also ding you with $18 surcharge if you just map the domain. So it’s usually cheaper to just transfer your domain.

Assuming you chose to Transfer your Domain, you’ll next need to unlock your domain and get the authorization code (a.k.a. EPP code), so wordpress.com can migrate your domain over to them.
The steps to do this vary by hosting company. WordPress.com keeps a list of the most common hosts, with links to their instructions for unlocking a domain and transferring the domain to a new domain registrar, here: Transferring a domain you already own to WordPress.com »Preparing a domain registered elsewhere for transfer to WordPress.com.
Here’s how I unlocked the domain with BlueHost:
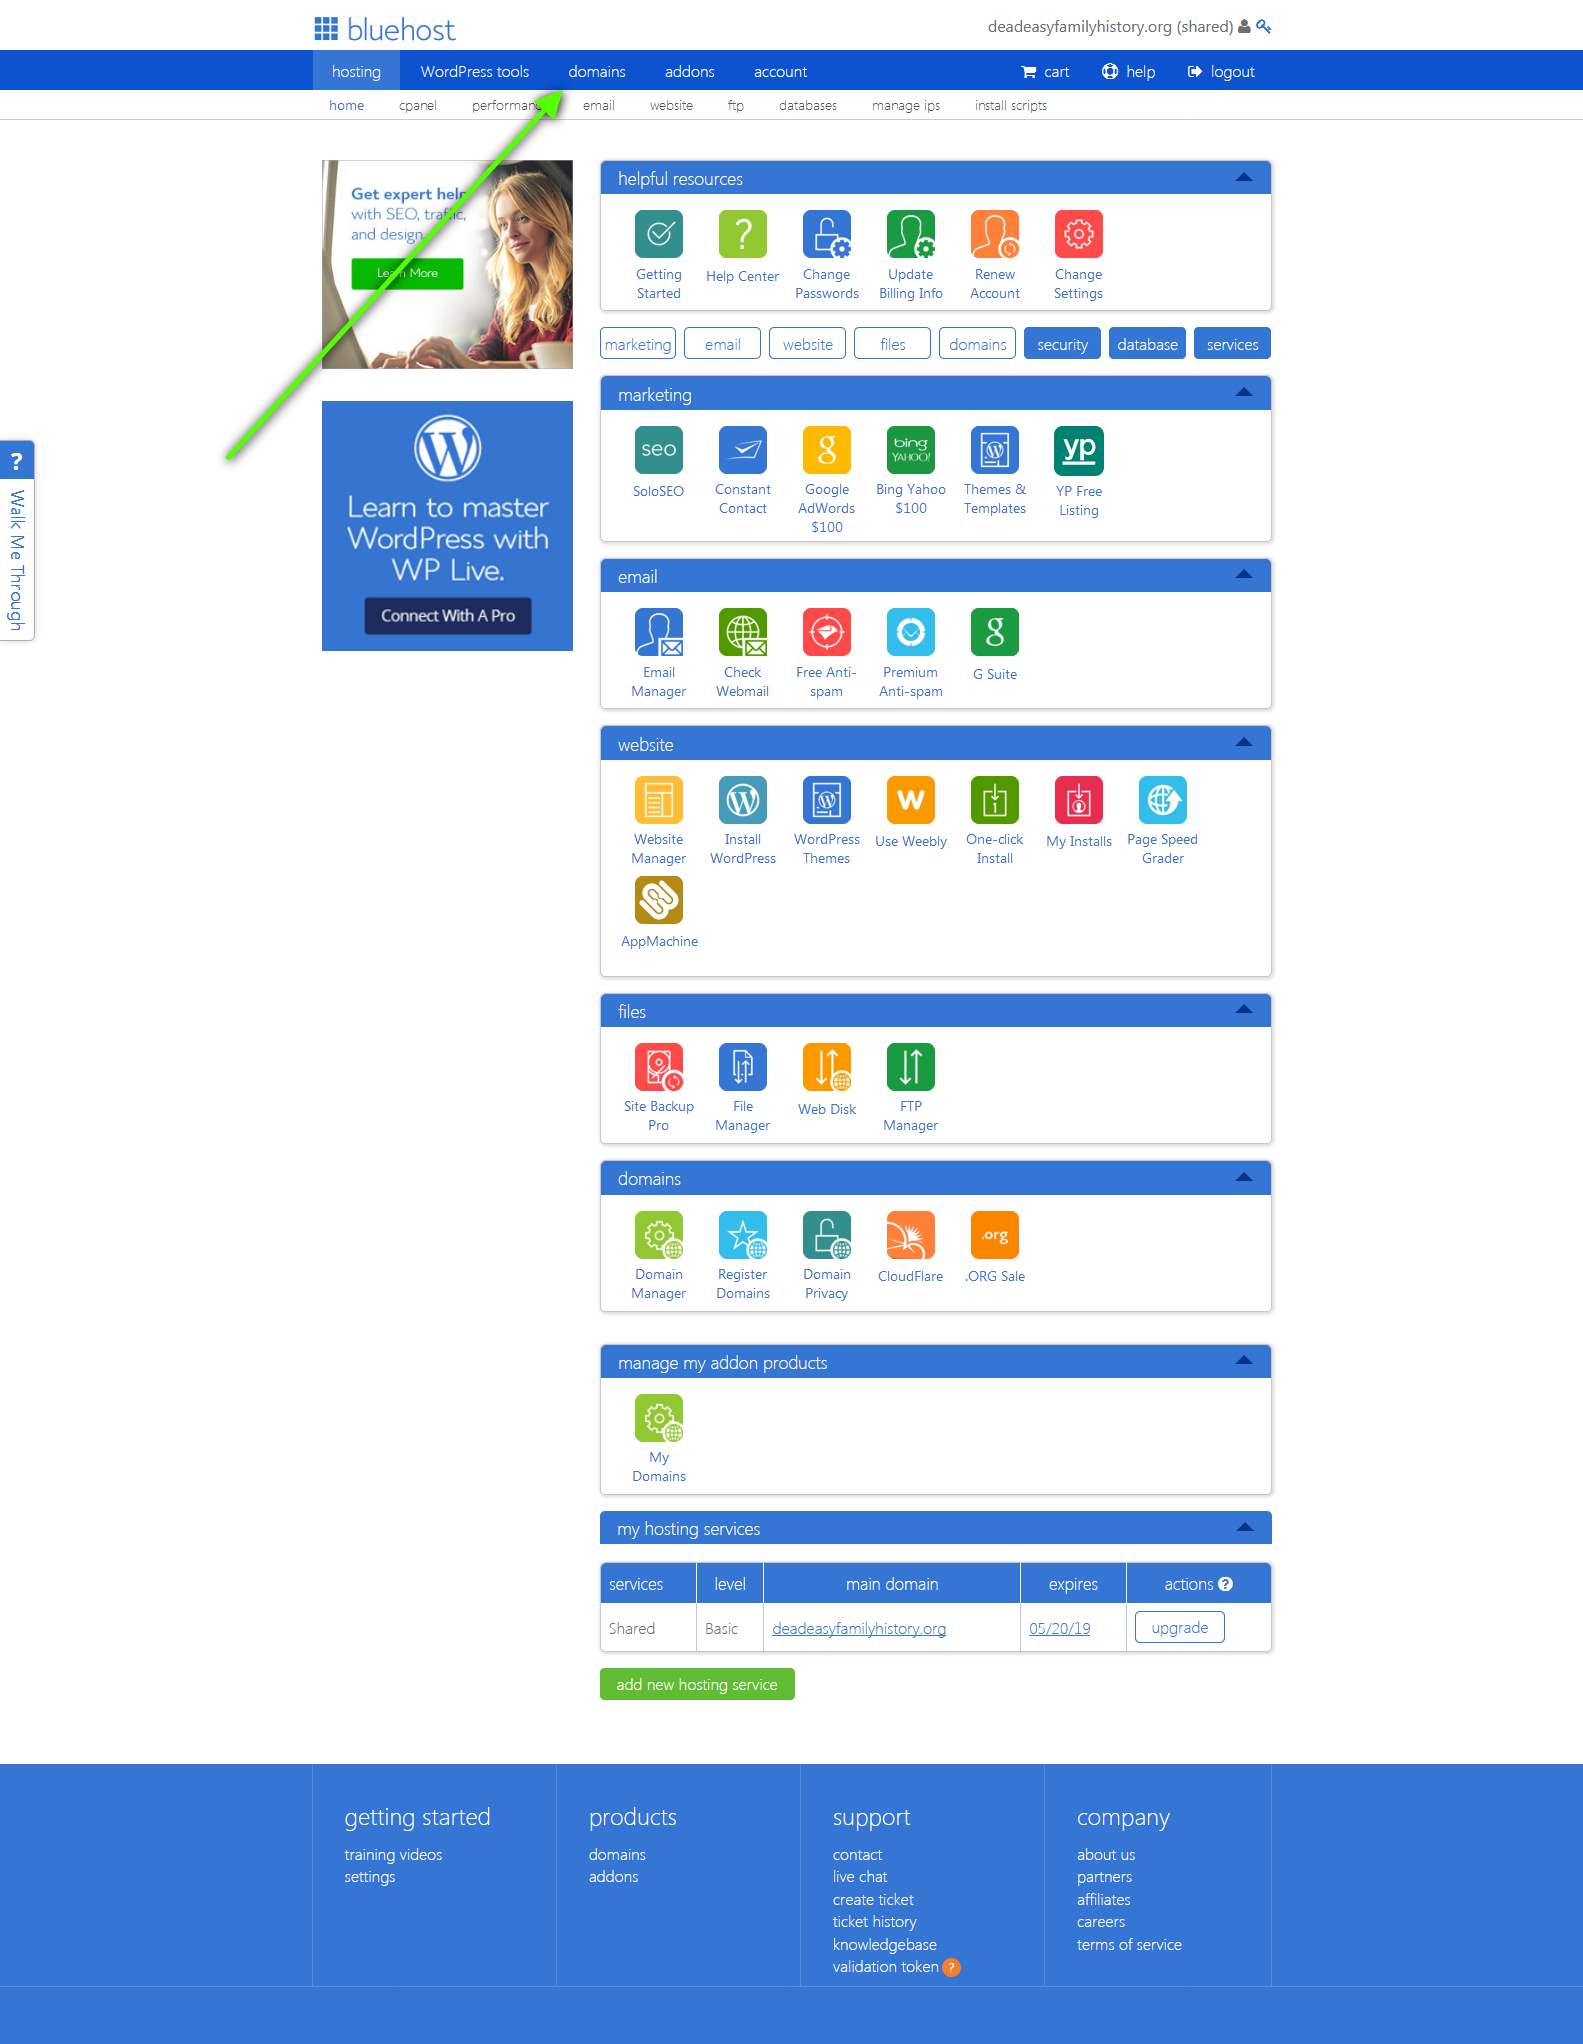


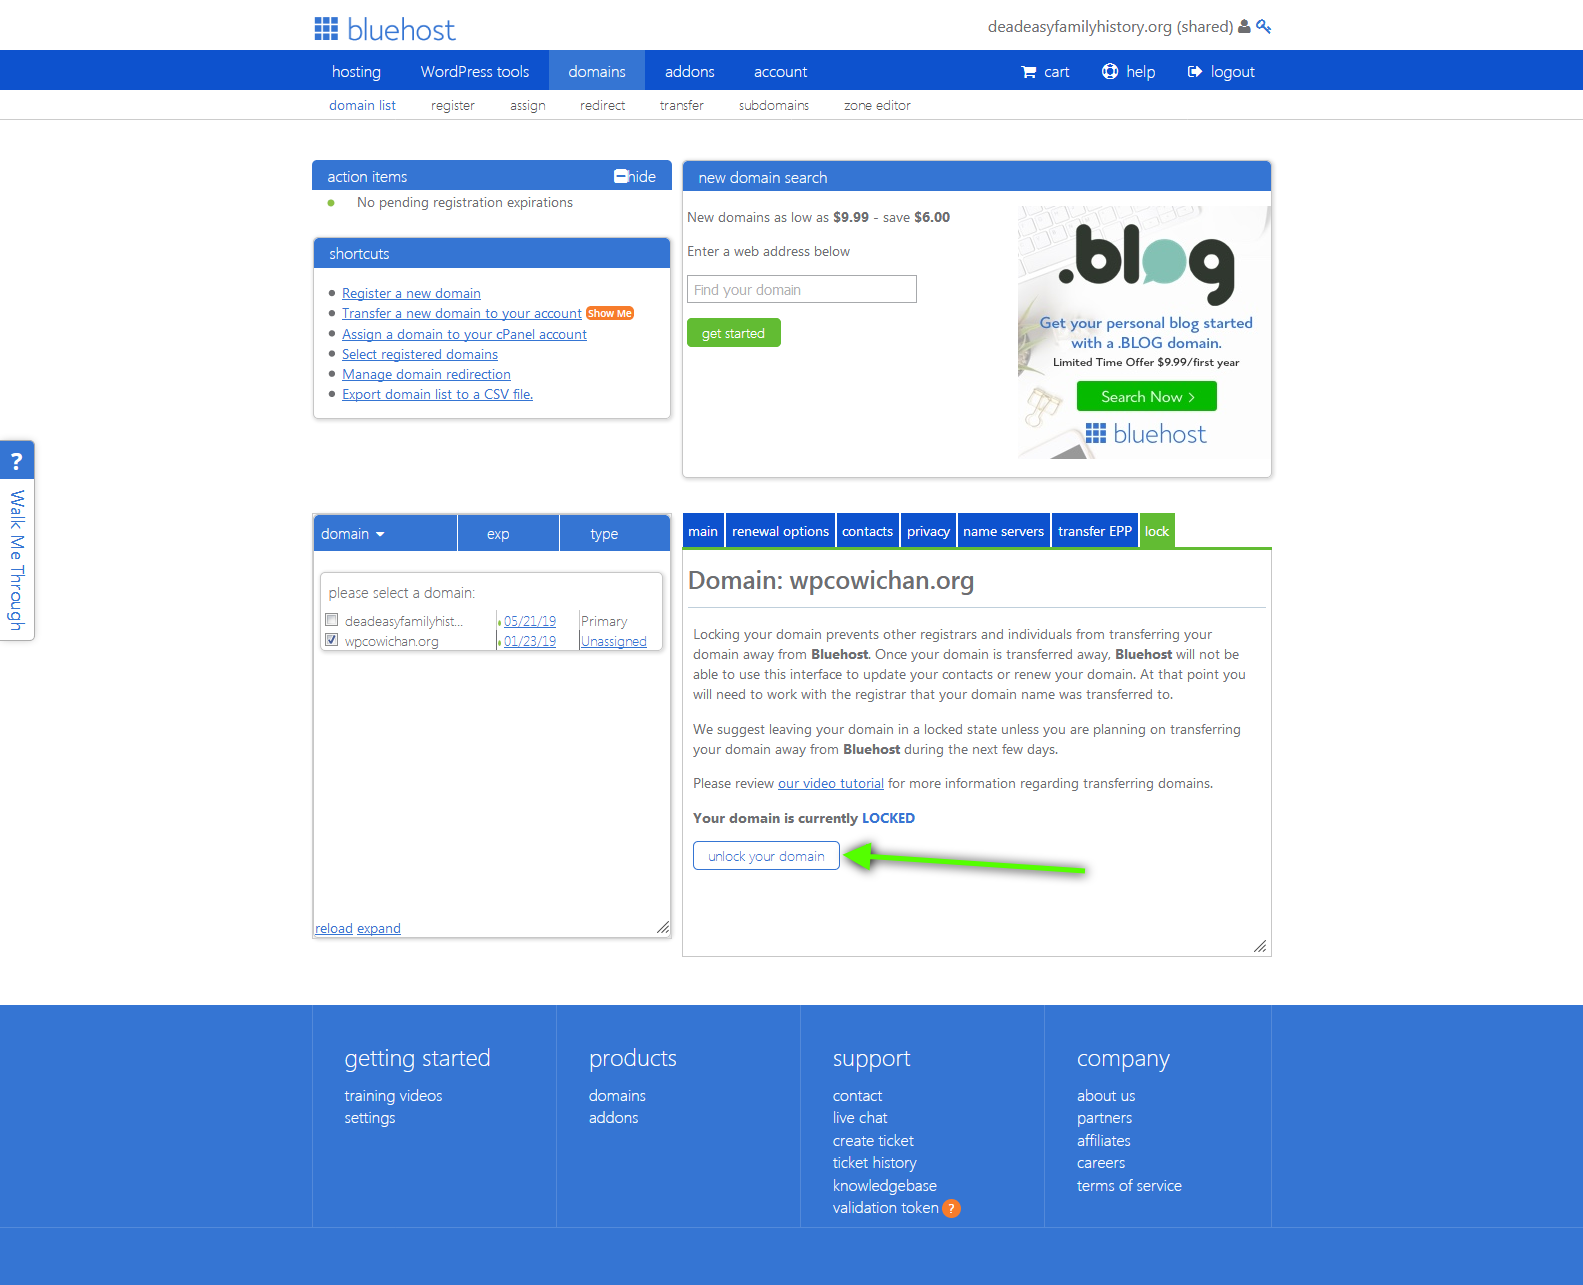
Your domain is now unlocked. Now to just get the authorization code (aka EPP code) so you can pass it onto WordPress.com.

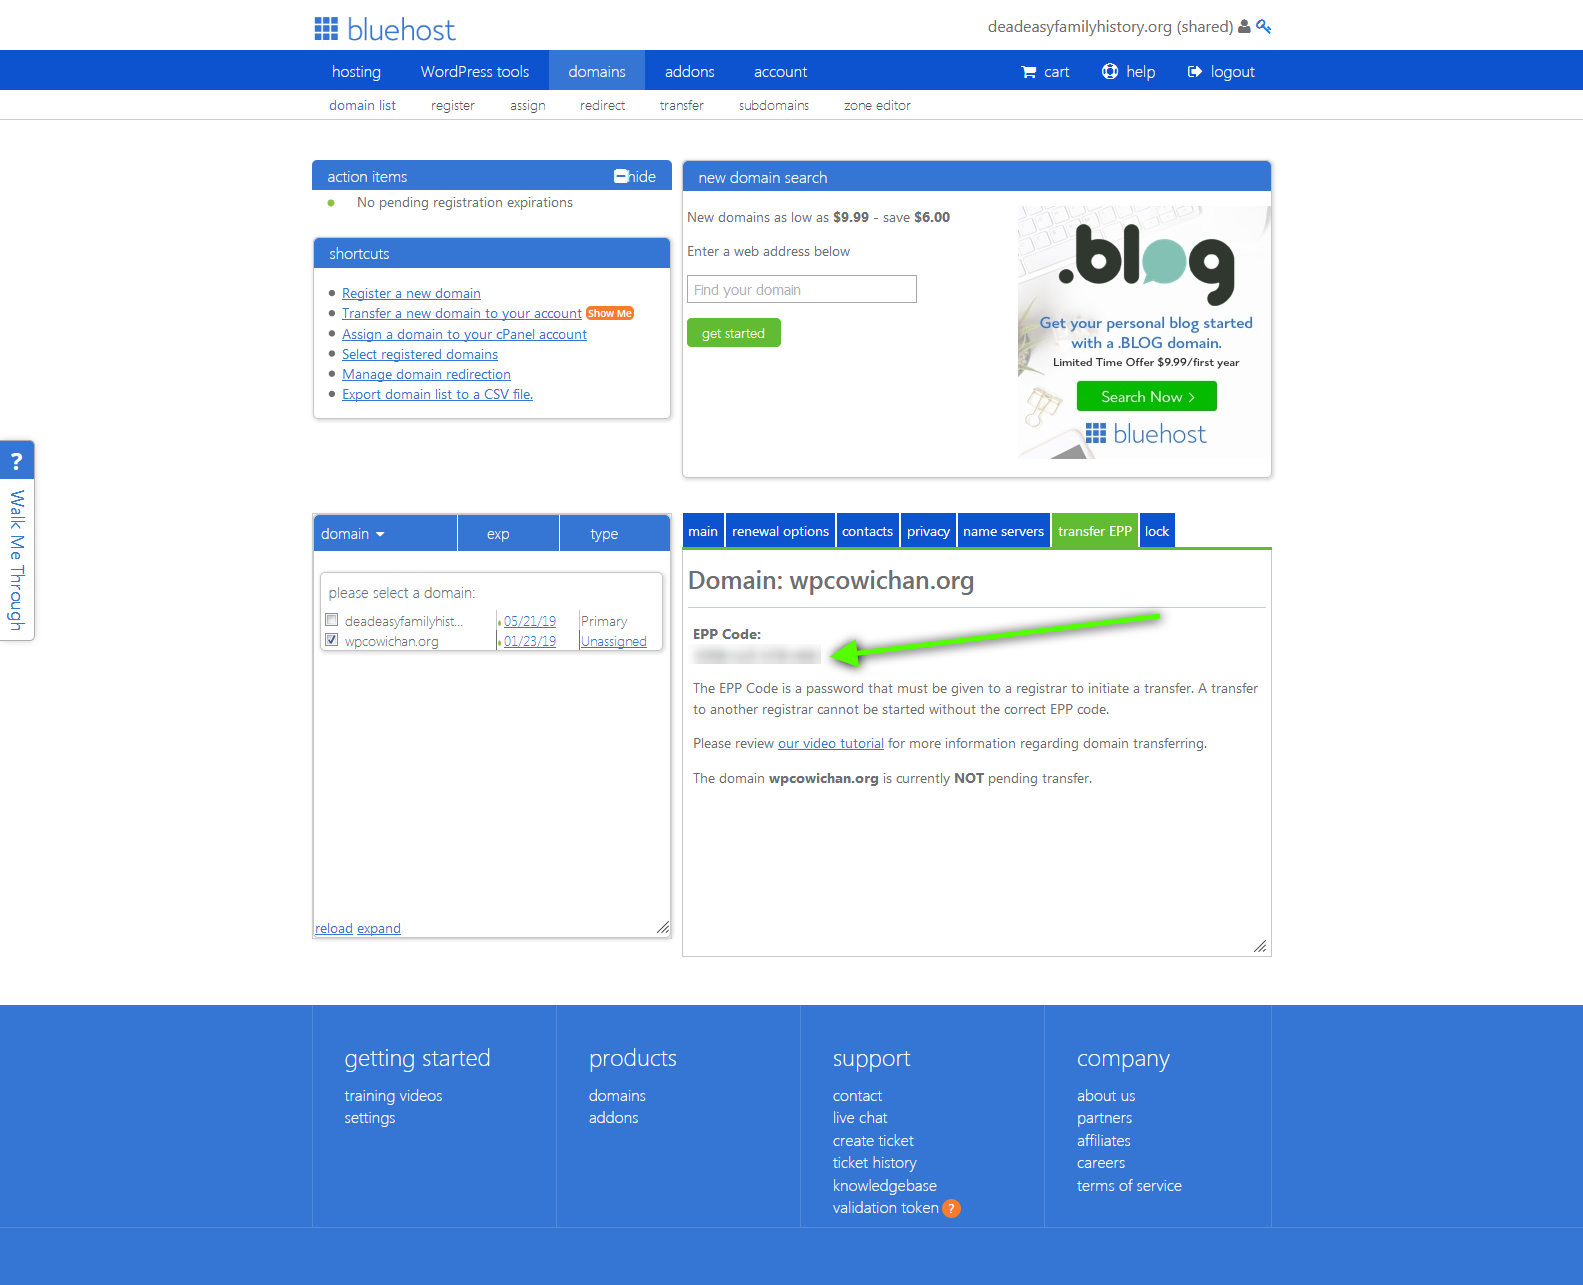
With that authorization code, you can complete the transfer to WordPress.com. So go back to WordPress.com…

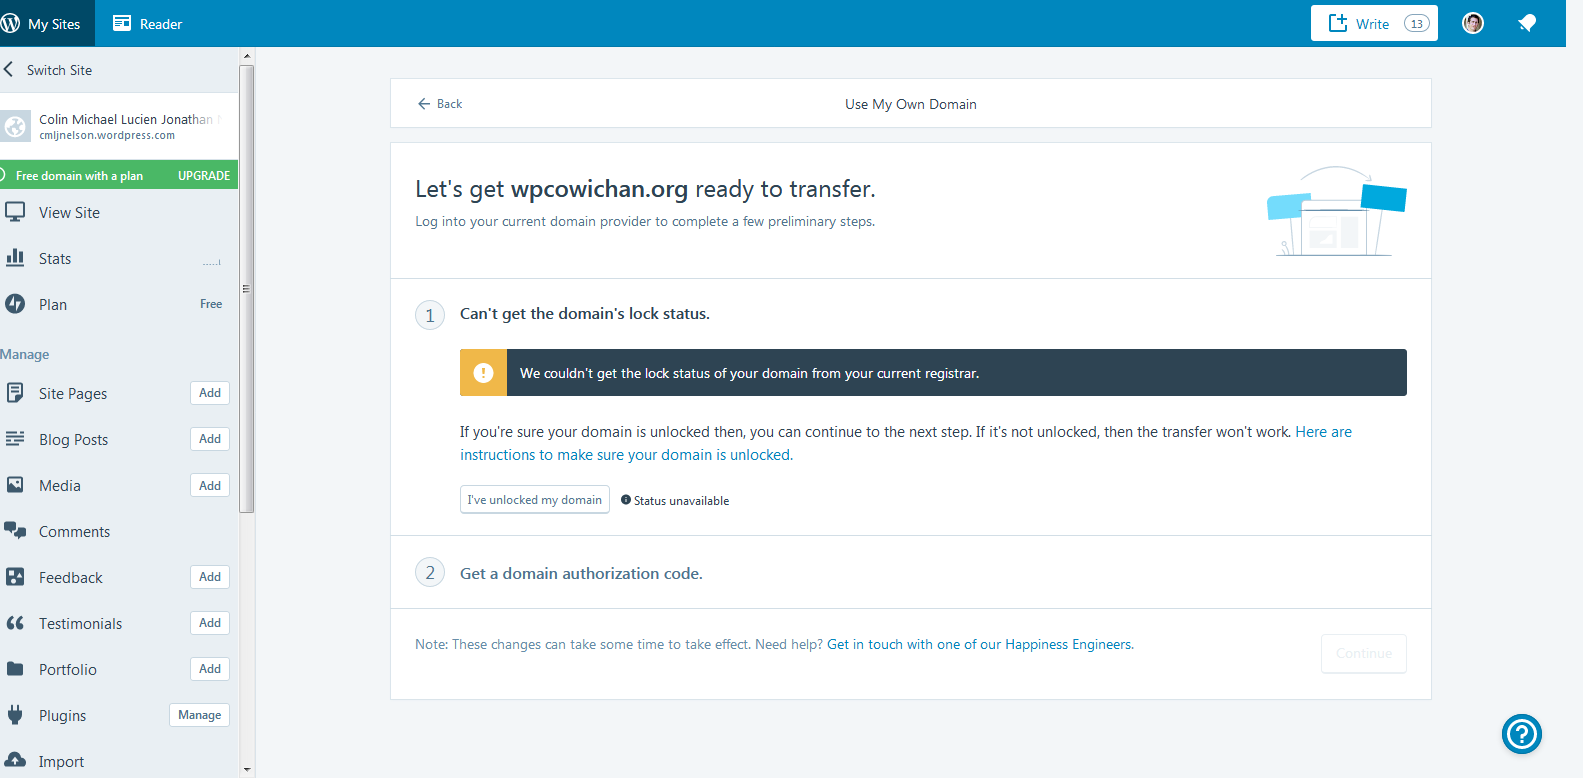
Once you’ve unlocked the domain, you’ll see a field for entering the “Auth code”. That’s the Authorization Code (aka EPP code) we got from the previous domain registrar earlier (in my screenshots, it was from Bluehost).
After that, they just ask if you’d like to pay a bit extra for privacy protection. If you don’t get it, you’ll probably get a bit more spam.
And after that, you’ll just need to sit and wait for 5-7 days while the domain transfers over (your previous hosting company might be able to expedite this, just ask their support).
When WordPress.com emails you to say the domain has transferred over, you’ll just go to your Domains page, select your domain, then click on Name Servers and DNS (WordPress may send you an email requesting you confirm your contact details before you can do this.) Then flip the toggle on under “Use WordPress.com Name Servers” so that it’s blue.
Once that’s all completed, your domain will be transferred to WordPress.com, so visitors of “kitchengadgets.com” will then go to your WordPress.com site. The transfer can take up to 72 hours. (During that time, it’s possible some visitors will go to your old site and some will go to the new one. That’s always the inconvenient reality of transferring domains.)
4.2 Migrate Old Subscribers
If your old site used JetPack, it probably had some subscribers who you’d like to now follow your new site. This is called “Migrating Subscribers” from your old site to your new one.
To do that, you simply have to contact wordpress.com support (see JetPack’s instructions under “Can I use this tool to move followers from one WordPress.com site to another WordPress.com site?”) Tell them “I want to migrate my subscribers from my old jetpack site (eg ‘kitchengadgets.com’) to my new wordpress.com site” (if you’ve already transferred the domain, so your old site and your new site both had the same domain, it might be a bit confusing, but they say that won’t be a problem.)
Migrating your subscribers can actually happen while your domain is being transferred to WordPress.com. So feel free to start this step (“4.2 Migrate Old Subscribers”) while you’re in the middle of the domain transfer (see “4.1 Transferring/Mapping Your Domain to WordPress.com”, above).
What to do with your old hosting services now? You may as well cancel them, unless you have some other use for them.
All Done!
How did it go? Were there any important details I skimmed over, or things needing clarification? Tell me in the comments. Also, you can ask wordpress.com support directly, even their free help is pretty good.
Hopefully after you’ve made the switch, you’ll be happilly blogging, instead of unhappily dealing with technical issues… but if you’re not happy, there are tons of tutorials on how to switch back to self-hosted WordPress from WordPress.com 😜.
Similar Stuff I've Written
 Me: Self Hosted!
 How I Moved from WordPress.com Without Paying for the Redirect
 The Really Easy Way to Make a WordPress Plugin Translation-Ready
How to Send Debug Info with WordPress’ Health CHeck
Meeting with WordPress Professionals
Introduction to the WordPress World
The Really Easy Way to Make a WordPress Plugin Translation-Ready
How to Send Debug Info with WordPress’ Health CHeck
Meeting with WordPress Professionals
Introduction to the WordPress World
 URL Validation in WordPress
Technical Notes on Contributing Code to WordPress Core
Getting Started Contributing Code to WordPress Gutenberg in Laragon
URL Validation in WordPress
Technical Notes on Contributing Code to WordPress Core
Getting Started Contributing Code to WordPress Gutenberg in Laragon
Powered by YARPP.
To be honest, I personally prefer self-hosted WordPress because I can know exactly what it’s runninh, own my data, and be the boss of it. On WordPress.com, you’re at their whim.
But I understand self-hosting is a chore not everyone wants to do. Specifically, Donna from my WordPress Meetup struggled with it: https://www.retirementreflections.com/what-i-did-during-my-blogging-break/
So I wrote this for folks like her.
I hope to have another post where I will compare the merits of WordPress.com and self-hosted WordPress..:
Good article
Thanks! I hope it helps somebody needing it.
Love this article bro. I like wordpress than self hosted.
This is exactly what I’ve been looking for, I still want to blog but don’t want to monetise and pay for expensive hosting.
Great to hear it Susan! Ya I understand that being self-hosted (and paying the bills for it- which can be quite cheap until you get upsold things that sound like you need) isn’t for everyone.
OkI know this is kind of an old post, but I am really trying to figure this out. I followed all your steps but I think they layout is a tad different than in 2018. I thought I got to the very end and clicked to see my imported website and it was still the template that it made me choose before allowing me to the screen to upload my old website. Any tips!?
Hi PoseyAndPoppy, sorry it didn’t work out. So it sounds like you tried to import your old website’s content (I mentioned that on step 3 above) but didn’t see of the content having made it over.
If that’s right, then I believe you need to wait a little while for them to import all the content over (like half an hour). If it’s been longer than that, then my steps might be out-of-date. I see WordPress has a more thorough article on this now, so you should probably read over that: https://wordpress.com/support/moving-from-self-hosted-wordpress-to-wordpress-com/
And if that doesn’t help, you should contact WordPress.com support. About a year ago I made the opposite move (from WordPress.com to a self-hosted site) and won’t be much help with WordPress.com stuff anymore).
I hope that helps!