
Building an email list is the key to successfully marketing a product or idea; and segmenting your audience is the key to a successful email list. In this tutorial, I’ll show how MailChimp, WordPress, and a bit of PHP coding can make that happen without paying for anything besides website hosting.
Specifically, this tutorial will show how to:
- create an email list
- place a form on your website to signup users for that list
- send subscribers automated emails, including ones with links to surveys on your website
- segment the respondents according to their answers
- and use their answers for future automated emails targeted based on their earlier responses.
In order to accomplish this I’ll make use of:
- MailChimp (a free account should be fine)
- a self-hosted WordPress site
- MC4WP WordPress plugin
- HTML Forms plugin
- My small custom-built HTML Forms MailChimp Update (HFMU) plugin from GitHub
Who is This Tutorial For?
If you’re already savvy using WordPress, and comfortable writing a bit of PHP, this is for you. If that scares you, then you’d probably be best sticking to the tools MailChimp offers. MailChimp can be used to host an email list signup page, survey pages, and email subscribers according to their answers.
If MailChimp can be used fine without a WordPress site, what is to be gained using it and those plugins? A few things:
- consistent design and branding with the rest of your WordPress website
- more control over the functionality (eg, you could have dynamic forms and integrate with other services like Zapier or plugins like WooCoomerce)
- more control of the data (survey responses will be stored in your private WordPress database, so you can do what you like with it)
If you already have WordPress website, I think its worth integrating it with MailChimp. But if not, you can just stick to using MailChimp on its own.
Background: My Situation
It might be helpful to understand what I wanted to accomplish when I did this. I’m launching a WordPress plugin called Print My Blog Pro for creating books and documents right in WordPress. I wanted to build an email list of interested potential users, email them updates on its progress, and survey them to understand what they needed the plugin to do to be the perfect solution for them. This way, even before the plugin gets released, I will know it meets the needs of actual users, and will be ready for sale.
Let’s Get Started
Ok, so maybe your situation is similar to mine or different. Either way, you’re going to need to start with a self-hosted WordPress website. A dirt-cheap hosting company like BlueHost or DreamHost will meet your needs fine. You’ll just need to be able to install plugins, and preferably be able to access the file system through FTP or SSH.
Building The Email List
Signup for a free MailChimp account and create an email list (called an “audience” in MailChimp).
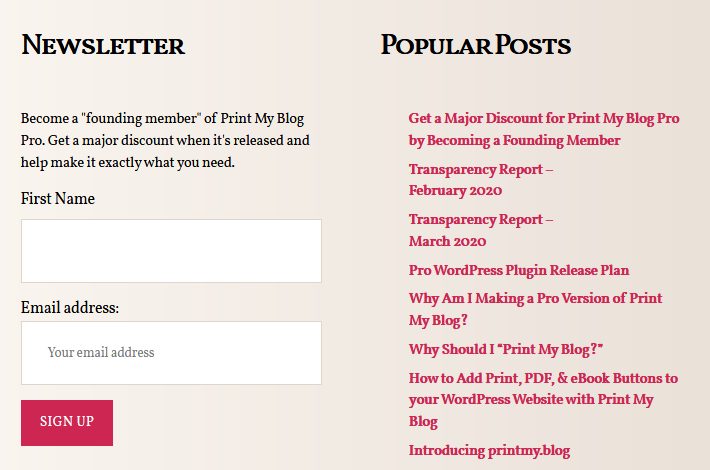
Install the MC4WP plugin (also free) on your WordPress site, connect it to your MailChimp account, and create a signup form and place it somewhere prevalent on your site, like in a sidebar or footer.
I think it’s best to keep this initial signup form as simple as possible: mine just required a name and email. The main objective is to just get them on the list. We’ll ask for more info later.
Create a Followup Survey
Install the HTML Forms plugin. What I like about this form plugin is you get to work with raw HTML directly, and it’s super lightweight. If you’d rather not write HTML directly, you could use another form plugin (Gutenberg Forms also looks promising: it integrates very nicely with the rest of WordPress’ block editor). If you use another form builder plugin you’ll need to adapt my instructions accordingly.
Create a mostly empty form and add it to a page of your choice. Verify you can fill it out and as a respondent. We’ll customize it in a minute.
I redirected my respondents to a thank you page, but it’s up to you.
Customize HTML Forms MailChimp Update Plugin
Next, install my barebones plugin HFMU from GitHub. This plugin will hook into when an HTML Form is submitted, and will then use the PHP library code from MC4WP to add tags to the respondents according to their answers.
Right now HFMU is just intended for folks comfortable editing some PHP.
So, open up the main file in your favourite editor. (I suppose you could use WordPress’ built-in code editor, but it’s quite possible you’ll make a syntax error, so it’s better to edit them with a separate program that will still be usable even if your site gets a fatal error.)
Here’s what to edit:
define('MC_LIST_ID', 'xxxxxxxxx');That’s the MailChimp “Audience ID”. Here’s how to get it from MailChimp.
define('HFMU_SIGNUP_PAGE', 'get-a-major-discount-for-print-my-blog-pro-by-becoming-a-founding-member');This should instead be the slug of a page or post you want to redirect users to if they visit your survey but we can’t identify what their email address is.
define('FIRST_SURVEY_SLUG', 'survey_1');
define('MAX_FOUNDING_MEMBERS', 50);
Change FIRST_SURVEY_SLUG to be the slug of the first survey. MAX_FOUNDING_MEMBERS is something you might not find necessary: I tag those first few sign ups as first_50_survey_respondents. If you don’t want that, comment out the following lines
//if(hfmu_qualify_for_founding_member()){
//    $tags_data['tags'][] = [
//        'name' => 'first_50_survey_respondents',
//        'status' => 'active'
//    ];
//} else {
//    $tags_data['tags'][] = [
//        'name' => 'subsequent_survey_respondents',
//        'status' => 'active'
//    ];
//}
Next, we define the dynamic inputs HFMU will show on the survey. It’s what gets returned by the function getHfmuSettings(). It’s a:
HFMUSettings- which contains an array of
HFMUForms, - each of which contains an array of
HFMUQuestions, - some of which contain an array of
HFMUQuestionOptions.
You can use what I already have in the code as an example. Here’s a simpler example:
function getHfmuSettings(){
    require_once(__DIR__ . '/src/HFMUForm.php');
    require_once(__DIR__ . '/src/HFMUQuestion.php');
    require_once(__DIR__ . '/src/HFMUQuestionOption.php');
    require_once(__DIR__ . '/src/HFMUSettings.php');
    return new HFMUSettings(
        [
            new HFMUForm(
                FIRST_SURVEY_SLUG,
                true,
                [
                    new HFMUQuestion(
                        'fav_feature',
                        'What is your favourite feature of Print My Blog (the free version of WordPress.org)?',
                        'textarea'
                    ),
                    new HFMUQuestion(
                        'purpose',
                        'What problem(s) do you hope Print My Blog Pro will help you solve?',
                        'checkbox',
                        [
                            new HFMUQuestionOption(
                                'print_backup',
                                'Backup my writing for when my blog isn\'t online anymore'
                            ),
                            new HFMUQuestionOption(
                                'blog_a_book',
                                'Write new book(s) (or other types of document) and blog simultaneously'
                            ),
                            new HFMUQuestionOption(
                                'book_a_blog',
                                'Convert existing posts to book(s) (or other types of documents)'
                            ),
                            new HFMUQuestionOption(
                                'edit',
                                'Make a copy for easy revising/editing content'
                            ),
                            new HFMUQuestionOption(
                                'visitor_print',
                                'Let site visitors print blog posts'
                            ),
                            new HFMUQuestionOption(
                                'share_print',
                                'Make a printed copy of blog posts to share offline'
                            ),
                        ],
                        true
                    ),
                    new HFMUQuestion(
                        'editor',
                        'Which editor do you prefer?',
                        'radio',
                        [
                            new HFMUQuestionOption(
                                'gutenberg',
                                'WordPress\'s Block Editor (aka Gutenberg, default since WordPress 5.0)'
                            ),
                            new HFMUQuestionOption(
                                'classic',
                                'Classic Editor (WordPress\'s default before 5.0, now requires using the "Classic Editor" plugin)'
                            ),
                            new HFMUQuestionOption(
                                'elementor',
                                'Elementor (WordPress plugin)'
                            ),
                        ],
                        true
                    )
                ]
            )
        ]
    );
}
That will correspond to inputs like these:
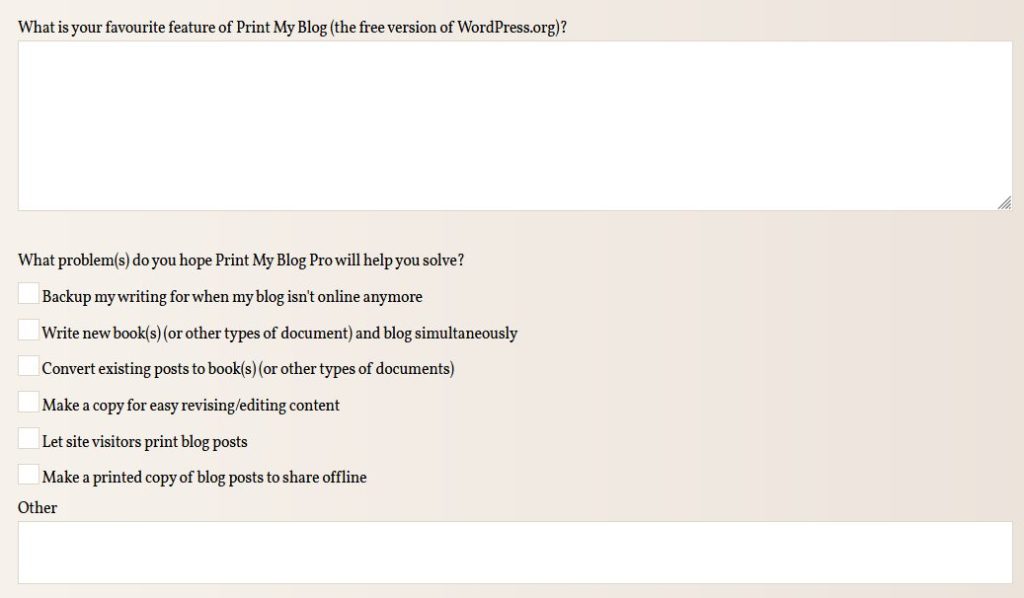
Just follow the PHPDocs on the classes and you’ll be fine.
Lastly, now edit your HTML form so it looks like this:
<input type="hidden" name="EMAIL" placeholder="Your email" value="{{hfmu_email}}" />

{{hfmu_questions}}
<p>
	<input type="submit" value="Send" />
</p>
{{hfmu_questions}} will be replaced by the dynamic fields from HFMU.
Ok! That’s all the PHP for today. You’ve created a form with dynamic fields which will be used both for display, and also for tagging the MailChimp contact. For example, if someone answers the question “What problem(s) do you hope Print My Blog Pro will help you solve?” (whose input’s name is purpose) with the option “Write new book(s) (or other types of document) and blog simultaneously” (whose input’s value is blog_a_book) their MailChimp contact will get the tag purpose:blog_a_book (survey-1) (that’s the question’s name, then their chosen option, and lastly the survey’s slug.)

survey_1_respondent (indicating they answered the first survey) and purpose:blog_a_book (survey-1), among others. All of those tags can be used for targetting future emails.Setup Automated Email(s) to the Survey
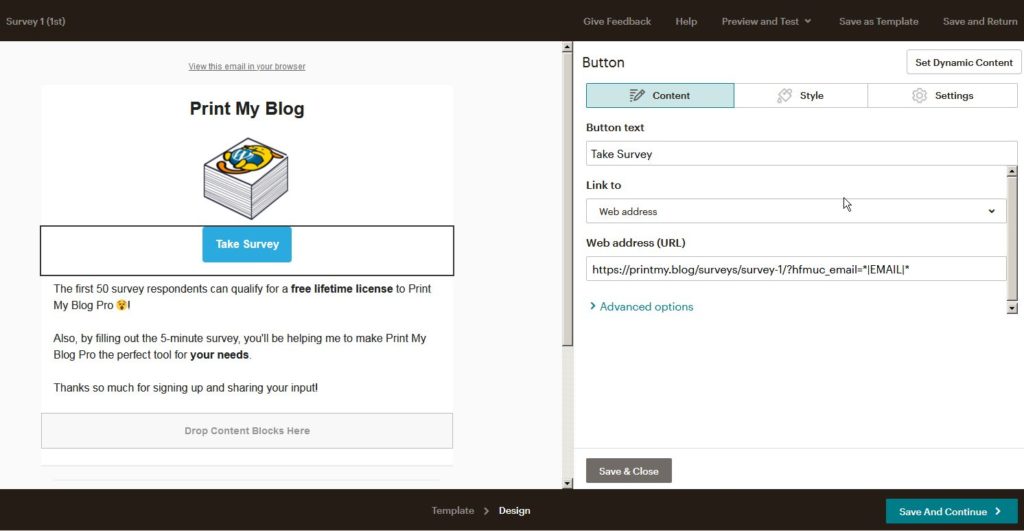
Now you probably want to setup an email linking to the survey to your subscribers. I set mine up to go automatically when they signed up, and a few reminder emails. But when they go is up to you.
What really matters is that there’s an email linking to the survey page on your site, and that the link identifies the respondent.
My survey page was printmy.blog/surveys/survey-1, so I added a link to it in the MailChimp email like this: https://printmy.blog/surveys/survey-1?hfmu_email=:|EMAIL|:. MailChimp will replace :|EMAIL|: with the recipient’s email when the email is sent, so HFMU will know which MailChimp subscriber to tag.
Paid versions of MailChimp let you setup an automated queue of emails to send. That sounds good, but I was cheap and only wanted reminder emails to go if subscribers hadn’t filled out the survey. To do that I created multiple email campaigns, and setup the subsequent ones to go a bit later than the first. Then, to ensure the emails stopped once they filled out the survey, I added an extra condition: don’t send it to subscribers with the tag survey_1_respondent (which gets added when they respond to the survey by HFMU). And that’s it!

survey_1_respondent, which they get when they fill out the survey. This way, folks who already answered the survey aren’t nagged about it anymore!Test It All Out
There’s quite a sequence of interactions here, so it’s good to test it all out start-to-finish. This is how I tested mine:
- Visit my WordPress site while logged out
- Fill out the MailChimp subscription form
- Because my list was double-opt-in, I went to my email inbox, found the email from MailChimp, and clicked the link in it, confirming I wanted to be on the list
- Got the first automated followup email with a link to the survey.
- Clicked the link to the survey
- Filled in the survey and submitted it
- Checked that I became a contact on the MailChimp list, and that I got tagged according to my survey responses.
Send More Targeted Emails
Now you can email the contacts automatically according to their survey responses because they’ve been given tags for each of their answers to multiple choice questions. For example, my survey asked respondents if they wanted to Print My Blog Pro to help them make PDFs or eBooks; once they answered and HFMU tagged their MailChimp contact with their response, I could then make an email to only go to those who wanted PDFs and another to go to those who wanted eBooks. In fact, I can even make a survey just focusing on PDFs (eg asking what format to use for the automated table of contents), and only send a link to it to contacts who indicated they were interested in that format. Pretty handy stuff!
QUestions?
So now you should have:
- an email list
- a form to subscribe to the list on your website
- automated emails, including one to a survey
- a survey on your site
- respondents’ MailChimp contact will get automatically tagged according to their survey responses
- more automated subsequent followup emails targeted based on respondents earlier survey responses
And so far, the only thing you’ve needed to pay for was your website! (Which you probably already owned.)
If you’re interested in seeing this all in action, feel free to signup for Print My Blog Pro ☺️.
Comments and sharing appreciated!
Similar Stuff I've Written
 Primary Lesson: We chose to follow Jesus Christ
 The Really Easy Way to Make a WordPress Plugin Translation-Ready
Setup PHPUnit In WordPress Plugins With Composer (Especially for Windows)
How to Relabel WordPress’ “Publish” Button for Custom Post Types
How to Migrate from a Self-Hosted WordPress Site to WordPress.com
Technical Notes on Contributing Code to WordPress Core
Preserve your Story with "Print My Blog" WordPress Plugin
The Really Easy Way to Make a WordPress Plugin Translation-Ready
Setup PHPUnit In WordPress Plugins With Composer (Especially for Windows)
How to Relabel WordPress’ “Publish” Button for Custom Post Types
How to Migrate from a Self-Hosted WordPress Site to WordPress.com
Technical Notes on Contributing Code to WordPress Core
Preserve your Story with "Print My Blog" WordPress Plugin
 How to Print Your WordPress Blog
Introduction to the WordPress World
How to Print Your WordPress Blog
Introduction to the WordPress World
Powered by YARPP.
One thought on “How to Tag Your MailChimp Email List With Follow-Up Surveys in WordPress”